Friday, March 15, 2013

Making mud huts with dryer lint

Are you prepared to follow me into crafting madness? Be certain, for in this blog post I will detail a formula so strange that it will violate everything you hold sacred and leave you gaping at the heartless black void with no illusions of God or logic to comfort you.

Well, it might not be that difficult to grasp, but it's certainly outside the proverbial box.

So, dryer lint, right? I have always wanted to find an industrial use for dryer lint. It's cotton -- a valuable commodity. It built the South! And now we're throwing it away? No, sir. Not in my domain.

 Figure 1 is a clump of dryer lint sitting in a plastic bowl.


 Figure 2 is a blurry picture of me pouring a glue-water solution into the bowl of lint.


 This is dryer lint -- not just cotton fluff, but also human and cat hair -- sitting in a pool of glue and water. Hey, anybody hungry?


 Glob by glob, I picked the waterlogged lint out of the solution and stuck it all over this half a box, a box that cough medicine came in. Just squish it on there. There's no need to make it even because what you're going for is a wattle-and-daub look.


 Here are two huts-in-progress, lint smooshed into place. I left space for doors.


 Primed white, doorways painted black, roof made of gluing sticks side by side.


 Doors by same method. Miniatures for scale. Don't think you're taking down a Greek with slingstones, kids.


Is anything ever done? I'm pretty happy with what I'm seeing here. I initially wanted to give it a tan wash, and I probably still should because even though the white looks good, rain or moss or blowing dirt would give it at least a little color in any environment. Right? I also belatedly wonder -- do mud huts have windows? I don't think so. I think if you live in a mud hut and you want some sun, you walk the hell outside.

I'm thinking about sticking these huts on a terrain piece, maybe with grass, trees, and a pen with a goat, maybe a shepherd, maybe a shepherd's wife. It'll be quaint.

Tuesday, March 12, 2013

Building terrain: broken green hill

I've made a few fun terrain features before, but nothing that my little friends can really climb on and fight over, so I got it into my head to make a hill. Nothing fancy here, but I'm happy with the results so I'll share my process with you, Internet.

I envisioned a hill with several terraces or tiers so that soldiers could inhabit it at different levels. Units the size of my 40-man phalanx would never be able to use this, unfortunately, but smaller units could. So I cut up and stacked some regular styrofoam.


I needed some brown paint -- a lot of people do green on green for hills, but I was going for a look with plenty of exposed dirt. A less lazy person would have gone out and bought some brown paint, but I noticed that there was some wood stain in my basement, so I figured I'd try that.

And this was the result. Looks like an ill-made chocolate cake and took a long time to dry. Regular acrylic paint probably would have been better.

But, once dried, it was a very serviceable brown lump.I had a layer of glue-water solution on the flat areas before I started sprinkling flock and afterwards I went back over the greenery dripping glue solution on any place that seemed to need a little more stick.  I have a bag of light green foliage material that is held together by tiny strings -- if you want loose flock, you have to stretch the clumps between your fingers until the green falls loose. However, this rain of green fluff gave me really nice coverage -- the flock fell not just onto the big flat areas I was planning to flock, but also into cracks and niches.  This reminds me of how plants grow even in inconvenient areas such as rocky slopes.

Here we are more or less finished. There are 4 tiers of height on which minis can stand, including a "king of the mountain" highest position that can only hold 1. I glued on a few fake plaster rocks to break up the green, but in the camera flash their whiteness is just too jarring, so I'm going to give them a light brown wash. Think I need some trees?

Thursday, March 7, 2013

Assyrian Slingers

As much as I love my Greeks, I love my Persian army too. Initially made as "something for the Greeks to beat up on", I found it titillating to build it with a lot less regard for historical accuracy than I did my Greek army. While I would never dream of including a Roman or Byzantine among my Greeks (I do have a few Trojans), for my Persian army I decided, since Cyrus's reach was so expansive, that I could include any miniature that suggested an origin of the Middle East, South Asia, or Africa. So I have Zulus (with their distinctive shields replaced so I can call them Nubians or Kushites), medieval Saracens, turbaned Indians originally meant for use in the colonial era, all in my Persian army. If I knew any wargamers who were particularly expert in the satrapies of the Achmaenid dynasty, they'd probably hit the ceiling, but since I don't know any, i have a highly multicultural Persian army. Maybe I'll show it to you one day; a lot of those guys are probably due for a touch-up since I improved my Greeks recently.

For today, eight new Assyrian slingers join the Persian army. I'm pretty sure this lot is historically accurate for Persian levies; the Persians did hold Assyria, although these guys may be sculpted for the Biblical era rather than the era of Xerxes' wars with Greece.

Feeling pretty good about these guys; they're Foundry, which has never done me wrong. Look at those action poses on the guys who have just released their stones. Teh drama! My only concern is that real life Assyrians (and Persians) liked to wear patterned clothing and I'm afraid to add patterns for fear of screwing up the shadows I have achieved on their tunics. What do you think, gentle readers? Do these guys need some fabric patterns added? Any tips on putting patterns AND shadows on a garment without ending up with a smudge?

Saturday, March 2, 2013

28mm girl on girl action

When I paint women, I find it useful to fall in love with them. What would they be like if they were life sized and alive, or if I were 28mm scale and metal? What would our relationship be like? Our lovemaking, would it be playful? Soulful? Slippery? This trio was part of the Celtos line, I forget what manufacturer makes them.  They're not necessarily my favorite line of figs because their tendency is to be a little cartoonish, with swords as broad as ironing boards, and features like the gigantic hair of their barbarian queen.

 I'd like you to hum "barbarian queen" to the tune of Billy Ocean's "Caribbean Queen" while you read this post. If you can't remember the tune, here's a link.

While not my favorite line, Celtos did make a pack that was hard for me to resist buying (off eBay): Two warrior-maidens carry their queen on a big shield. These girls are easy to love. A Vallejoish design philosophy informs the sculpts. The servility of the maidens is balanced by the dominance of their queen. The queen has a breastplate and the servants each have a tit-napkin covering their chests, and nobody is wearing pants, yet, in a wonderfully Celtic dichotomy, everybody has cold weather boots (a contrast which I have intensified by putting white fur on the boots). Big tits and big hair call to me, a child of the 80s, with the dulcet tones of a Motley Crue power ballad -- or the soundtrack to Heavy Metal.

 I didn't do anything too innovative here. I did take my first attempt at what the mini painter's Internet calls "Bette Davis eyes" . Here's the process:
1) Paint eyes early, whites first, pupils second.
2) surround the eyes with a ring of a very dark flesh color (here I've used black, which looks okay if anachronistically mascara-like on these girls, but won't be my preference for future Bette Davis eyes).
3) paint the face in as your normally would, making sure you leave a that dark ring around the eye area. A dark circle around eyes makes them pop, as anyone who wears makeup would know, but I'm just finding out.

Here Bette Davis eyes were difficult  because all of these ladies had canopy-bangs that made it tough to get precise brush strokes in there.

You'll note that the darkest areas on these women's skin are reddish. The shadow/basecoat on a Mediterranean are olive, the shadows on a Persian's skin are brown, and on an Indian they're purple. In doing this, I realize that I am painting my skin tones partially realistic, partially expressionistic.
 Hair is solid color, darker wash, final drybrush with a slightly lighter than original version of the first color. Metal areas got light base, dark wash, highlight with the same or lighter light base.

Regrettably, these saucy wenches don't have anything to do with any game I play or any army I field. They were just too fine not to paint. Stayed up til 5 in the morning with these wenches, but this was all done in a single day! The toughest decision was which hair color went where. My personal fondness for dark hair made me want to put the brunette on top, but in the end, red hair is so much more dramatic that there really was no argument.

Sunday, February 17, 2013

The making of a tower

I took an oatmeal container and glued spitballs in roughly stonelike shapes. I attached them with a water/Elmer's glue mixture (basically paper mache).

Then I primed the whole thing gray.


 Kind of sloppily drybrushed a lighter gray onto the surface of the stones.

It's a serviceable tower, but next time I'm going to prime it white and paint the stones gray (the lighter mortar will look more naturalistic) and I'm going to make those spitballs smaller and more regularly shaped.

Wednesday, February 6, 2013

I have standards

Greetings, small handful of followers. I thought I'd start today's post with some new hoplite shields.

 A short meander and a wine jar.


 An olive branch (no implication of peace in the classical era) and the wheel of legs -- I'll bet there's a name for that design but I do not feel like looking it up.


 Mighty Zeus and a bleating goat.


 What my girlfriend calls the "dancing bull".

Painting hoplites and their shields really does it for me. The challenge of inventing or researching a design and then trying to freehand it and make it look good on a 1/2" area is very stimulating and I save it for last on each fighter, the dessert I earn for painting one of these fellows.

Now for a tougher problem.

I made some standards to play WFB. Warhammer Ancient battles notes that classical Greeks aren't allowed to have standards (because they aren't historically accurate -- phalanx fighters, packed into squares, had neither the ability nor the need to watch the movements of other units on the field and Greeks didn't use such things). Despite the departure from history, I enjoyed the opportunity to envision what a Greek standard might look like. I mounted a couple of iconic classical images on sticks: the head of the gorgon Medusa and the treasure of Colchis, the Golden Fleece.


 I'm fairly happy with my ingenuity on these babies. The fleece is painted fabric (from a fuzzy girl sock) (the sock was fuzzy, not the girl) and a plastic goat's head from a set of farm animals. The gorgon's head is Sculpey and pipe cleaners. It's a good DIY but as my minis get repainted, rebased, and look better and better, the standards are starting to look very DIY. I mean, look at that fleece. It's the side of a bear's hide, not a sheep's.

What I've got to replace them: I picked up a box of fantasy standards on discount.On the larger one, I can mount my greenstuff gorgon's head and just give it a paint job and it should lie at the junction of easy and peasy. The ram's head -- and I really should break out the greenstuff and do it again because my ram's head doesn't look all that great -- would be mounted on the smaller standard and then I might actually flock the smaller standard on one side to give the appearance of wool on one side and tanned skin on the other.

Point of interest: that ungulate head is more of a goat than a ram, since its horns don't wrap around on themselves. You think you can sculpt a ram's head? OK, smart guy. get some clay and twist it into a ram's horn. Easy enough, right. OK, now do a ram's horn that curves in the opposite direction for the other side of the head. Nigh impossible, right? Yeah. If you're right handed it is hella hard to twist clay so that it spirals to the right.
Close up of the head of Medusa, which was damned good for my first flirtation with Greenstuff.

It'll be sad to leave behind my original standards and move towards standards made of more standard wargames modeling materials. I like making odd, outside the box things. But I think if these things are going to look good enough to hang out with my other toys, changes are going to be made, and the plans I have are still going to make use of my artistic talent; it's not like I'm buying a Golden Fleece standard out of a box. Hopefully I will grow to love them. Like the song says, loving (28mm battle standards) is easy if they're beautiful.

Friday, January 25, 2013

Cavalry and Greenstuff

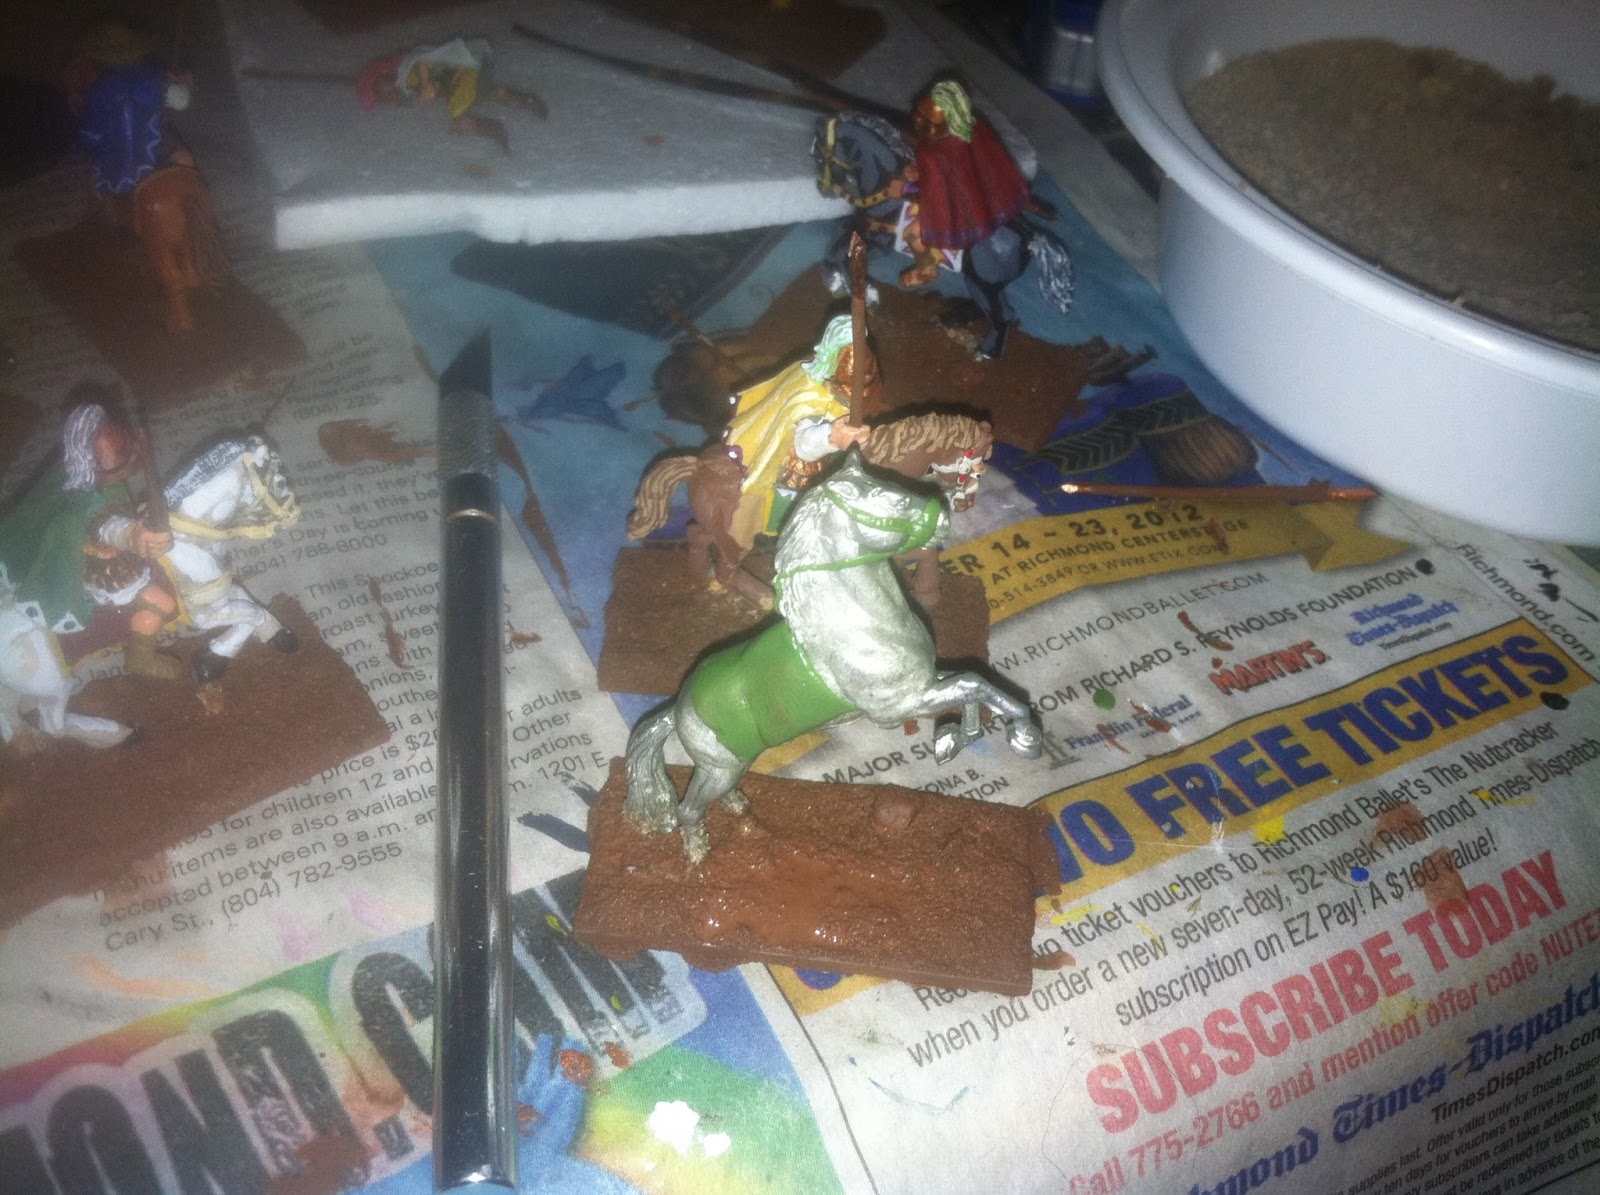
While painting my hippeis, I got a bug up my ass, and the bug was this: why are all my horses "four on the floor"? A horse rearing up is such a dramatic pose that it astounds me to see very few 28mm horse miniatures up on their hind legs. My need for a rearing horseman ticked in my brain like the tell-tale heart; I would go mad if I did not get one, so I ordered a pair from England. Along with them I got some greenstuff. I used a tiny amount of greenstuff to make this saddle and bridle, as this horse had been naked.

I didn't find it too hard to work with. A 50-50 blend of the two greenstuff components gave me a slightly stiff clay and I have some clay experience. For the saddle blanket, I just mashed some greenstuff on its back and cut it into a more or less square shape. The reins were just some very thin snakes, you know snakes, the first thing everybody learns how to make with clay.

I decided immediately that I ought to try something a little more complex and so I went further: I sculpted replacements for my two phalaxes' battle standards, a golden fleece (for which i needed to sculpt a ram's head) and a gorgon's head. I also tried a lyre; I'd love to have a lyre player for a unit musician. In my opinion, the lyre and the goat's head came out a little on the clunky side but they demonstrated that, with a little practice, the kind of sculpting i want to do, I can do. The medusa's head is really good and I might well mount that sucker on a metal standard, consider replacing my old sculpey and pipe cleaner gorgon's head standard. That debate will be the subject of a future post.

Here's that rearing horse with his greenstuff saddle. I decorated his base before painting the figure which was kind of backwards for me but didn't cause any serious problems.


 And here he is with paint and rider. I love him, from the horse's musculature to the lyre device on the shield. The first time I painted that saddle I ended up peeling the entire paint job off, which tells me that greenstuff needs to be primed.

And now the whole cavalry unit with Rearing Guy front and center. I've decided he'll count as the unit leader if i use these fellas in a wargame

Dramatic angle.

This picture shows the proper use of Hellenic cavalry: smashing apart a gang of peltasts. The wedge formation that a lot of wargamers do with their cavalry was called the "Flying Theban Wedge" in Greece.
 Smashy, smashy