Friday, January 25, 2013

Cavalry and Greenstuff

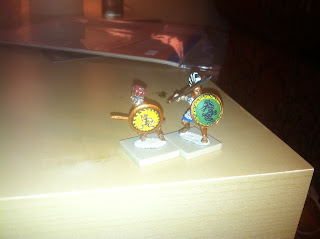
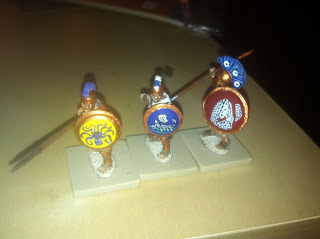
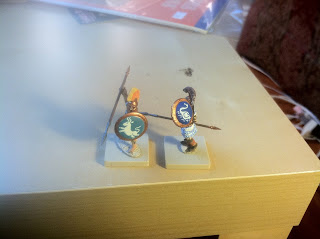
While painting my hippeis, I got a bug up my ass, and the bug was this: why are all my horses "four on the floor"? A horse rearing up is such a dramatic pose that it astounds me to see very few 28mm horse miniatures up on their hind legs. My need for a rearing horseman ticked in my brain like the tell-tale heart; I would go mad if I did not get one, so I ordered a pair from England. Along with them I got some greenstuff. I used a tiny amount of greenstuff to make this saddle and bridle, as this horse had been naked.

I didn't find it too hard to work with. A 50-50 blend of the two greenstuff components gave me a slightly stiff clay and I have some clay experience. For the saddle blanket, I just mashed some greenstuff on its back and cut it into a more or less square shape. The reins were just some very thin snakes, you know snakes, the first thing everybody learns how to make with clay.

I decided immediately that I ought to try something a little more complex and so I went further: I sculpted replacements for my two phalaxes' battle standards, a golden fleece (for which i needed to sculpt a ram's head) and a gorgon's head. I also tried a lyre; I'd love to have a lyre player for a unit musician. In my opinion, the lyre and the goat's head came out a little on the clunky side but they demonstrated that, with a little practice, the kind of sculpting i want to do, I can do. The medusa's head is really good and I might well mount that sucker on a metal standard, consider replacing my old sculpey and pipe cleaner gorgon's head standard. That debate will be the subject of a future post.

Here's that rearing horse with his greenstuff saddle. I decorated his base before painting the figure which was kind of backwards for me but didn't cause any serious problems.


 And here he is with paint and rider. I love him, from the horse's musculature to the lyre device on the shield. The first time I painted that saddle I ended up peeling the entire paint job off, which tells me that greenstuff needs to be primed.

And now the whole cavalry unit with Rearing Guy front and center. I've decided he'll count as the unit leader if i use these fellas in a wargame

Dramatic angle.

This picture shows the proper use of Hellenic cavalry: smashing apart a gang of peltasts. The wedge formation that a lot of wargamers do with their cavalry was called the "Flying Theban Wedge" in Greece.
 Smashy, smashy


Sunday, January 13, 2013

Get a job, you damned hippeis

A hilarious joke in ancient greek - hippeis means cavalry.

Cavalry was not the Greeks' strong suit until the time of Alexander. The cavalryman of the classical period might cynically be described as a guy rich enough to own a horse and thus get out of the rigorous training that a middle class hoplite would get. In battle, they mostly chased down enemies who were broken and fleeing, or disrupted low-ranking troops like peltasts or psiloi. They guarded the flanks of the hoplites somehow, I guess by charging light and maneuverable troops when they tried to flank the phalanx.

Lacking stirrups and saddlehorns, the Greeks didn't do mounted archery or couched lance charges. They did have a nasty spear called a kalyx, which they would use with an overhead downward thrust, aiming for the neck or behind the collarbone. They also used the makhaira (Heeeeeeey makhaira), a single edged saber, shaped to deliver a slicing or chopping blow with the full force of a charging horse behind it. They'd also carry a few javelins, becoming missile troops that could be quickly deployed to a strategic point.

A lot of them went unarmored, but I prefer my figures to flash some bronze, so the ones I just bought have helmets and shields. They were marketed as Carthaginian cavalry by Gorgon miniatures but with their crested helmets and round shields, they read as very Greek.

Work in progress shots:
I decided, rightly, that it would be best to get the horses' saddle blankets all prettied up before I stuck the riders on, rather than trying to paint around their legs.


 Getting down to the details. You like those spears? Those are made of copper wire, pounded and clipped by yours truly. They've got a much better feel than plastic spears and obviously they don't snap. Plastic spears are more regular and more convenient.


 You gotta put a little bit of snazz on their cloaks.


 Shields, ba bang. Probably the best Medusa I've done, and that horse head is no mean feat because I find horses hard to draw. In the foreground is a Trojan.


 I hate to see you go, but I love to watch you leave.

I also had some old horsemen sitting around. I probably painted these guys a year ago. It was encouraging to put them side by side and note my own progress.


                                                                     1 year ago < today


Progress! Now I have to channel this positive feeling into repainting these older guys, which is not my favorite task. 


Sunday, January 6, 2013

Good hoplite shields


My hoplites do not share a color scheme on their uniforms and each one has a different design on his shield. I've been told that a unit looks better when all the fighters are uniform, but I have declined to follow that advice. For starters, I collected these hoplites from half a dozen different manufacturers and since their sculpts don't really match (some have a breastplate and others a linothorax; some have a tunic and some are naked), matching the outfits is out of the question. There's also the issue of my getting bored painting the same design over and over. 

But the larger issue is a historical one. A hoplite was a middle class man rich enough to afford panoply but not a horse. Except in Sparta, where the state issued each soldier a red cloak (doesn't show blood) and a Lambda shield, a citizen was expected to provide his own armor. In many cases it would be handed down from father to son. I doubt your average phalanx was uniformed. 

The Greeks were a far more individualistic culture than the more collectivist cultures of their contemporaries in Persia, Egypt, and the rest of the Near East. Each hoplite's shield was his opportunity to make a statement -- about his self-image, artistic sensibility, even his sense of humor. One fighter had nothing but a life-sized fly  painted on his hoplon. He explained that in battle, he would get right in the enemy's face and the fly would seem to be the size of an elephant or a dragon or something. Anyway, every hoplite gets a unique shield. Here are my better ones. 

 Two shields with birds on them. Athena's owl with olive branch is an oft-done motif. The rooster is the emblem on Achilles' shield (his own rooster was the proudest & most aggressive animal he knew) but I've never seen a period chicken design so I winged it. Ha ha. These are 2 colors: one for negative space, one for detail.

 A ram's head and a woman's head, again, one color for negative space with details painted on with a second color. These are also notable for my attempts to do a simplified meander (or "Greek Key") around the central design. It looks good unless you study it very closely and note how inconsistent the design is. This does not bother me because how often is a player going to pick up a mini and study it so critically? From 2 feet away it looks great.


 Athlete with discus and seahorse, again notable for nice borders.


 Bunch of grapes and amphora. On the grapes I had this fool idea to paint three Eroses (cherubs) flying with a red ribbon. The figures don't read very well because I couldn't do details that fine. I won't try anything quite that intricate again.


An octopus, a trireme, and a woman coming her hair. I love putting womens' faces on hoplons.


 Bull, swan. These are two of my best one-color designs, just using the background color as negative space. Sometimes the simplicity of one color designs makes them look a little kindergartenish, but sometimes I get elegant simplicity and I think that's what I've gotten here.


The lizard is another well-executed single color design; I'm not posting my less successful ones. The Greek writing is pretty exciting to me -- this shield contains an anachronistic and poorly remembered Greek Easter song. If I do another text shield, I will paint the opening lines to the Iliad!

Peltast trays finished

In my last post, I documented the steps I took to build, texture, and paint the trays of some Greek peltasts. When I left off, I was gluing, tuft by tuft, bits of greenery to the individual figures' bases. I continued to glue grass throughout the weekend (I entertained many guests, so that was slow going), first to the figure bases, then to the tray itself. Of course, every time I handle my toys, I see another place that could use a spot of paint or something, so I'm hesitant to ever say that anything is finished. That being said, I'm ready to show the Internet my movement trays.


 Tall grass is harder to work with than grass that just lies on the ground. I like to take a narrow bundle of (fake) grass and mush a bead of Elmer's glue into it at 1/3 of its length and another at 2/3 of its length. When the glue is completely dry, you can cut at 1/3 length and 2/3 length and get 3 bundles of grass, each held together at one end by a drop of glue.
Anything can always be improved. Each of these trays has one smooth edge from the original cut of the foamcore board, and only after adding paint did I notice that the rough cuts I made myself look much better (more natural, like a formation of earth). Also, as I noted earlier, I should have cut larger indentations into the foam core because these guys fit very snugly into their slots and I'm afraid I'm going to crack off some paint or glue as I push them into and pull them out of their slots. Oh, but a man's reach should exceed his grasp, or what's a Heaven for?

Here are 7 more peltasts; they aren't the ones on their movement trays so I guess they're my reserves. They have nice bases and shields and so I thought they deserved to have their picture taken as well.

Next time: my top 10 hoplite shields.

Friday, January 4, 2013

Behold the creation of a peltast movement tray

Foamcore board is cheap and easy* to cut into. Here is a sheet of foamcore with a bunch of 20mm squares cut out -- that is, the top layer and about half the stuffing is cut out with exacto knives. I spaced the peltasts 1/2" because that's how skirmishers function in WFB, the only wargame I've actually played. I've got to play more wargames.
Next time, I'm going to make the square slots a little bigger, because this time it became more difficult to put the peltasts in their holes as i added sand and glue to the board and it became less pliable.

Next came the sand. The last time I used sand, it was to make a bunch of Persians look like they were actually walking through the desert. It was pretty easy to make sand look like sand. This time I was going to use sand to get a textured terrain. Forward.

I painted the mini bases with a mixture of regular Elmer's glue and water and dipped them into a bowl of sand. I applied the same glue-water to the board and sprinkled it with sand. I got sand all over my painting area and had to change the newspaper. Next time I do the sand dipping outside.

Next I gave all those surfaces with a wet brown paint, not a wash but a bit thicker than ink.

The brown was a pleasing earth tone and I almost backed off of drybrushing on top of it. In my artistic endeavors, I have found that sometimes the more features you add to the work, the greater the risk you screw it up. I got over it.


These two pictures show the difference between drybrushing with a light tan and no drybrushing.

Then I started adding grass. I have some beautiful looking fake grass and I have no idea what it is or where it came from, but it is kicking ass. Sometimes I'm using it to cover up places where the paint/sand coverage is, as the Spanish say, anot so good.

 Like this.
More to come.

Thursday, January 3, 2013

Welcome to my blog. I am starting this page primarily to talk about the joys of painting 28mm miniatures. Maybe later I'll talk politics.

My greatest mini painting project is to create an ancient Greek army. It's roughly modeled after an army from the time of the Persian or Peloponnese wars, but I feel free to take creative liberties such as including a satyr piper as my unit musician and throwing a few centaurs into my cavalry.

Here are some hoplites.
More to come.